
Creating Identities & Passes
How to create identities, manage their access and passes, and add them to identity groups.
An identity is a person in elumo — a member, employee, visitor or contractor. Giving someone access comes down to creating their identity (or letting it sync in), issuing them a pass, and adding them to the right identity groups.
Identities come from two places, shown by their Source: Direct ones you create in the portal, and ones synced from an integration. You create and fully manage Direct identities here; synced identities are largely managed in the integration.
Finding identities
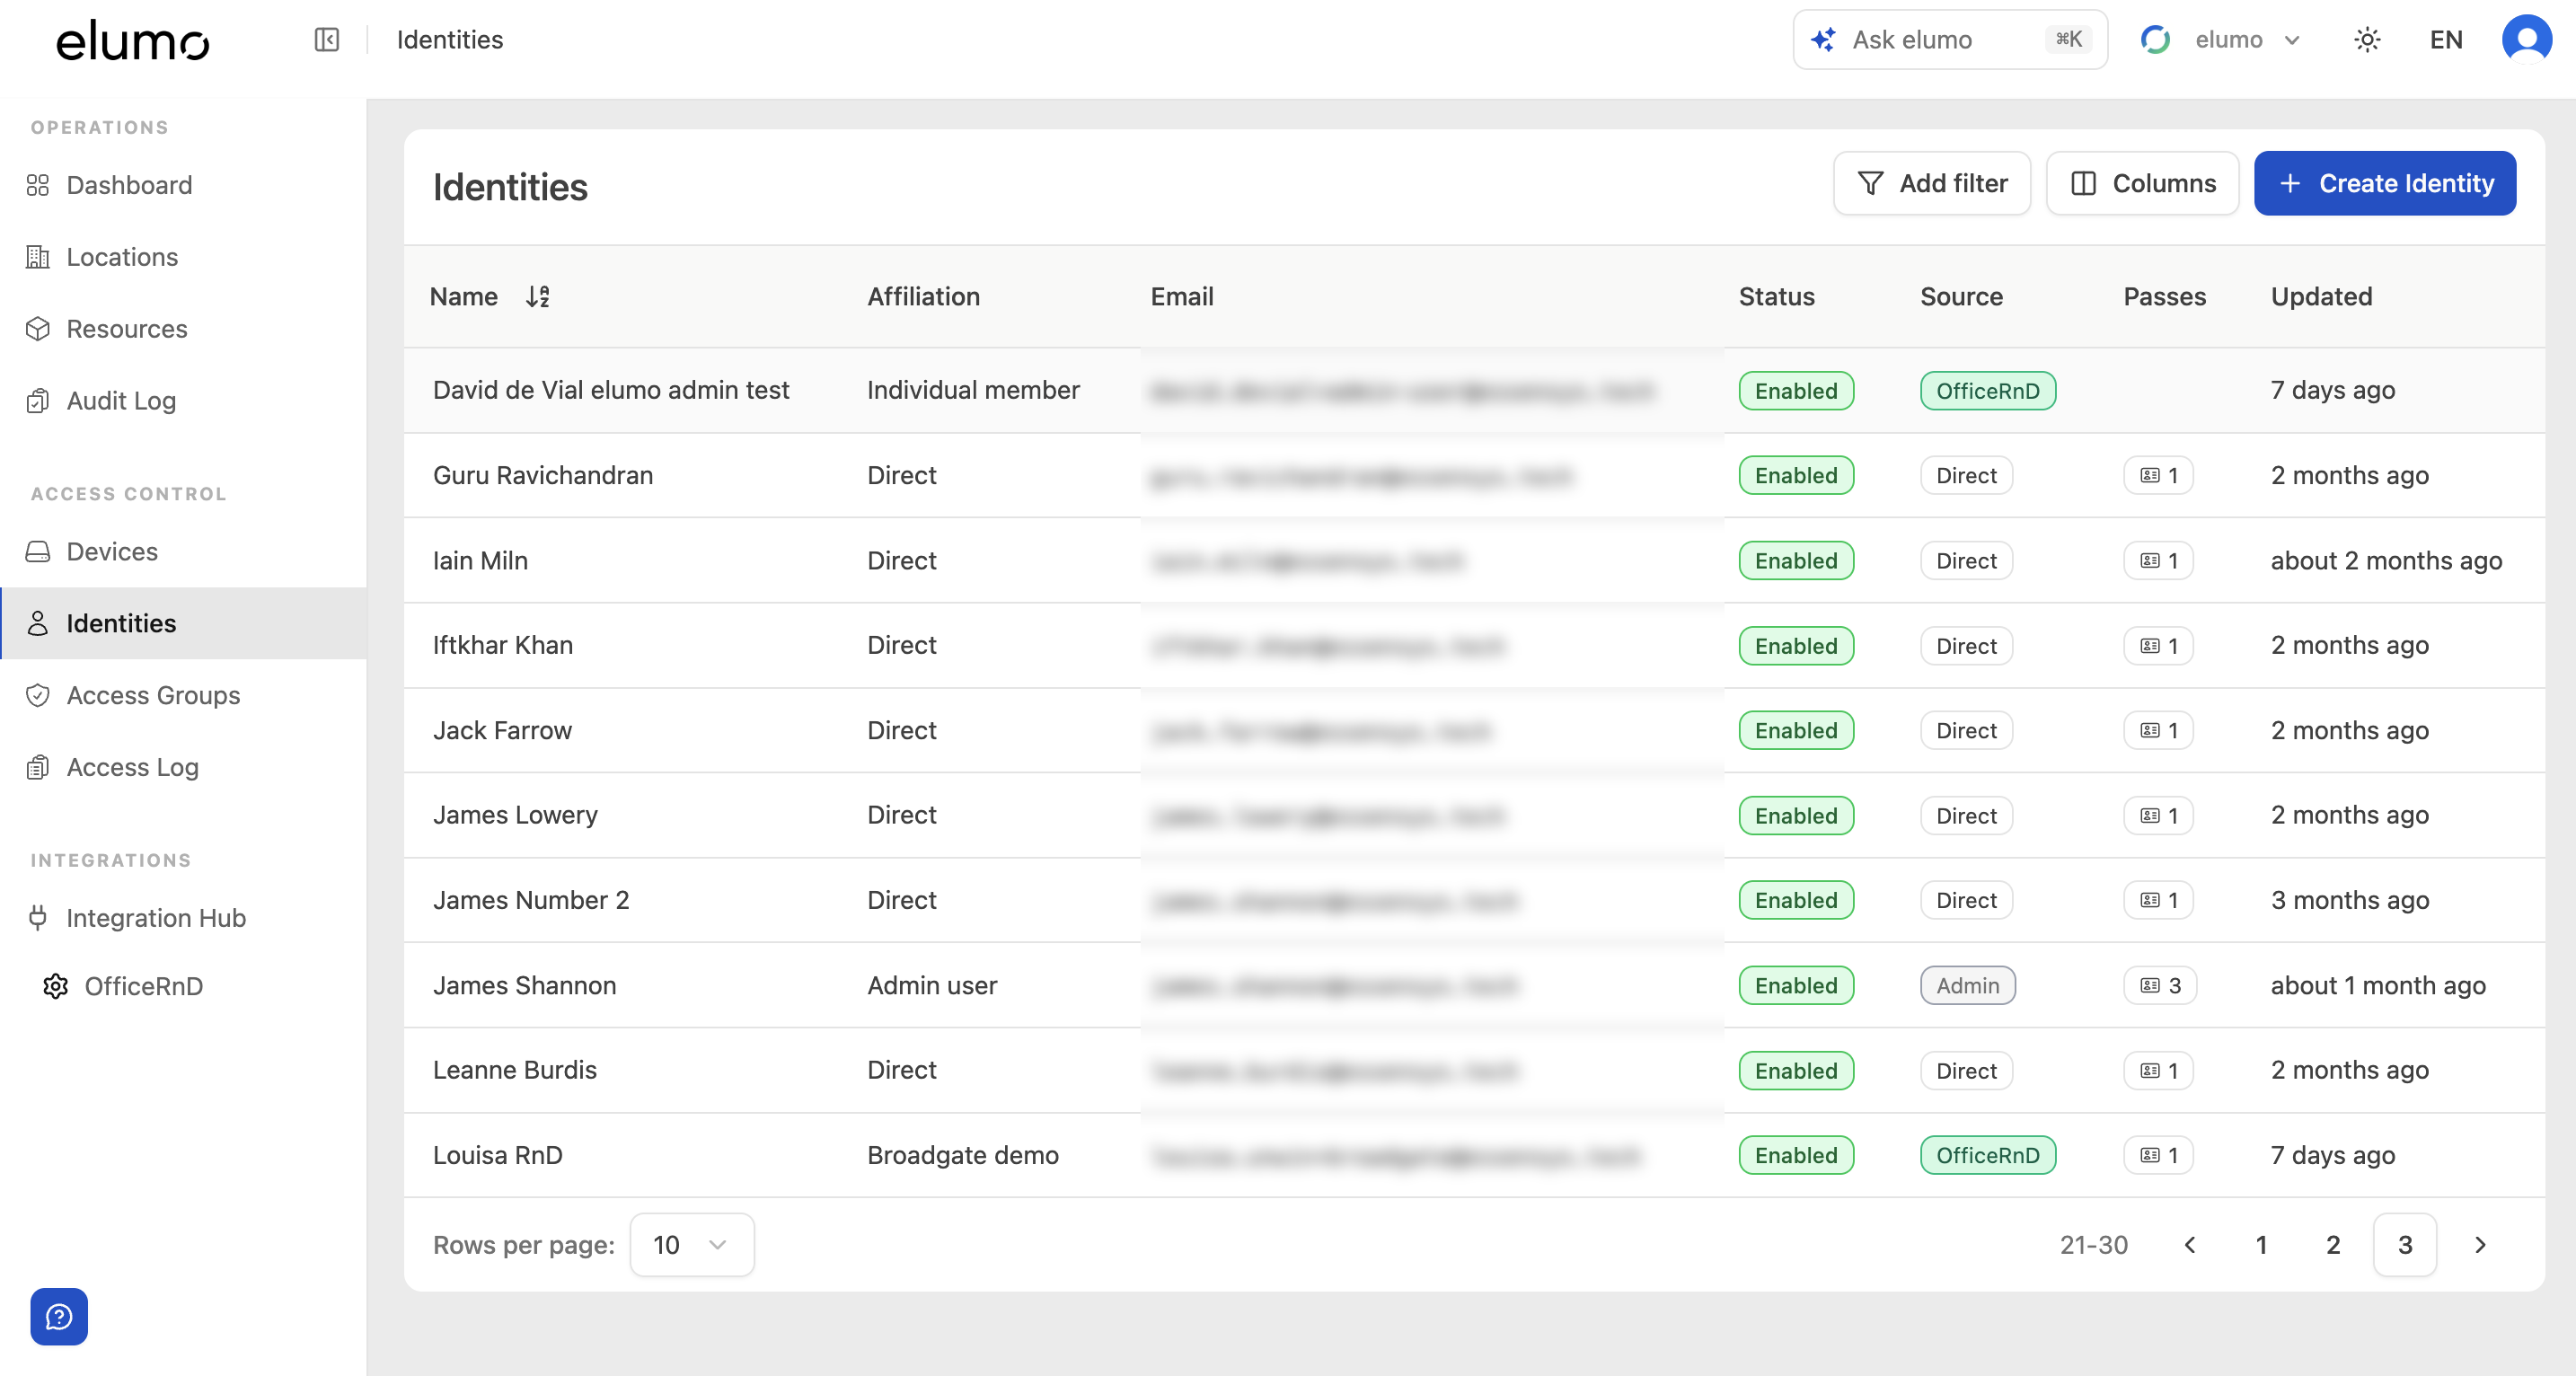
In the left-hand navigation, under Access Control, select Identities. The list shows each person’s name, affiliation, email, status (Enabled or Disabled), source (Direct or from your integration) and how many passes they hold. Use Add filter or Columns to tailor it.
Creating an identity
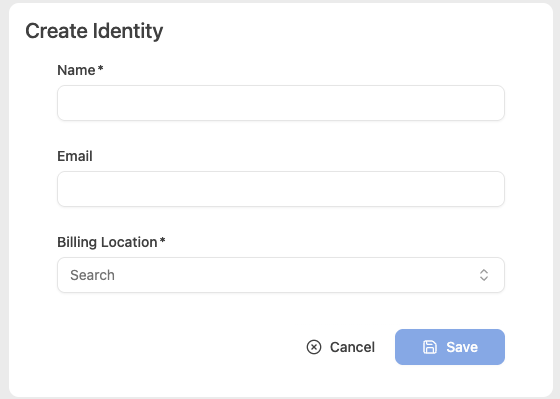
Select Create Identity and complete:
Name — the person’s name. Required.
Email — used to send their pass invite. Optional, but add it if you want them to add their pass themselves.
Billing Location — the location this identity is associated with. Required.
Select Save. The new identity opens, ready for a pass and group membership.
Editing, disabling & deleting
Open an identity to see its email, status, source, affiliation and billing location, with Overview, Access log and History tabs. From the header:
Edit — change the name, email, billing location and status. Name and email are read-only when the identity is linked to a portal user or synced from an integration, since those come from the source.
Disable — immediately revokes the person’s access without deleting them; Enable restores it. Use this to pause access for someone who has left or is away.
Delete — removes the identity entirely.
Identities that are created by the integration can’t be edited or deleted in elumo. Their Edit and Delete buttons are replaced by a ‘View in Integration’ link (or the relevant platform), and details like name and email are managed in the connected system. You can still Disable them, issue passes, and change their identity-group membership here.
Passes
The Passes section on the Overview tab manages a person’s access passes. Someone can hold a physical card and/or a digital wallet pass (Apple or Google Wallet). There are two ways to add one.
Add a physical card
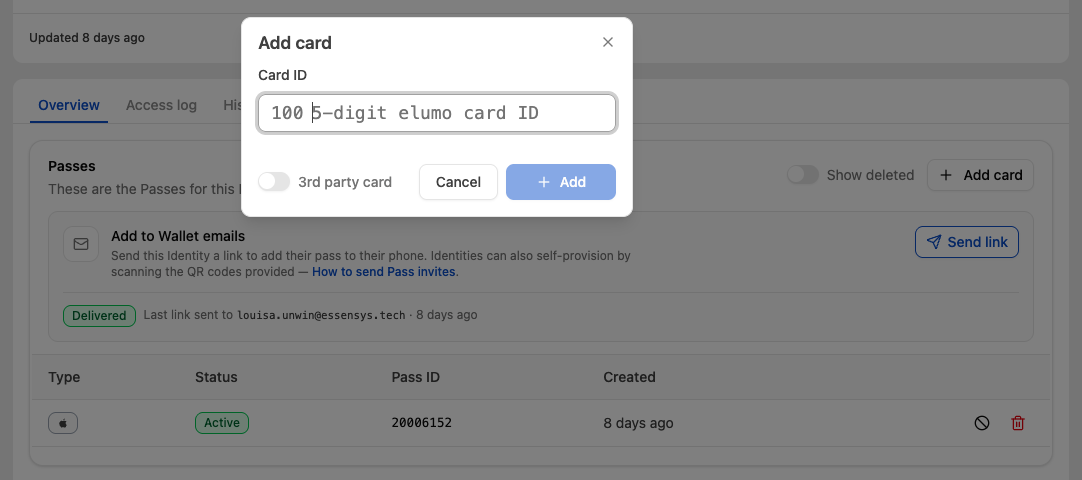
Select Add card and enter the Card ID:
By default elumo fills the 100 prefix for you — just type the 5-digit elumo card ID printed on the card.
Turn on the 3rd party card toggle to use a card from another system instead; the prefix is dropped and you enter the full 8–11 digit card ID.
Select Add to issue it.
Add a digital pass
Digital passes go straight into Apple or Google Wallet. The best way is to let the person self-provision: they scan the QR code and add the pass to their phone. If you’d rather push it to them, use the Send link, to email them a link. Either way, there’s no physical card to hand out. After a link is sent, the Add to Wallet emails panel shows the delivery status of that email so you can confirm it reached the person — note it only shows the latest email, so sending another replaces what’s displayed.
Checking a pass’s status
Each pass row shows its Type, Pass ID, when it was created, and a Status that tracks the provisioning journey. A digital pass sits at Pending while it’s being set up and moves to Active once it’s on the person’s device — so if a pass is stuck on Pending or shows as failed, provisioning hasn’t completed and you can re-send the invite or investigate. Deactivate or delete a pass from its row, and toggle Show deleted to see revoked ones. (A pass still in Pending can’t be deactivated yet.)
Identity group membership
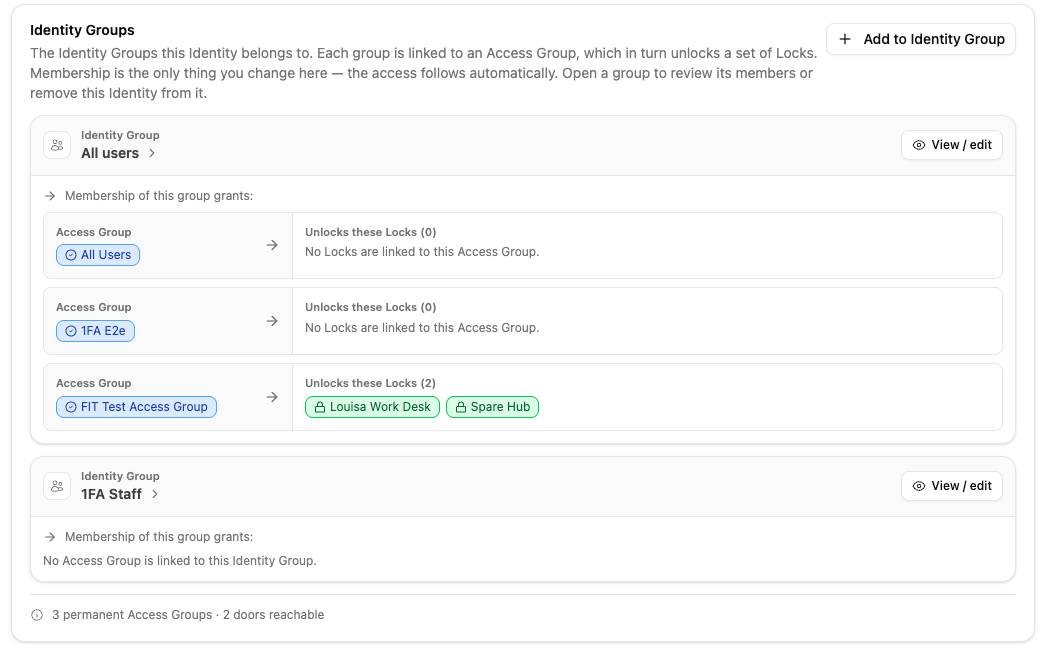
The Identity Groups section shows which groups the person belongs to. A group can be linked to an Access Group, which unlocks a set of locks — so membership is the only thing you change here, and access follows automatically.
Select Add to Identity Group to add them to one.
Choose View / edit on a group to review its members or remove this identity from it.
Good to know
Creating an identity doesn’t grant access on its own — the person gets in only once they’re in an identity group that’s linked to an access group or if they are linked to a booking that’s come from the integration.
Disable is the quick way to cut access without losing the identity or its history.
Add an email if you want the person to add their own pass from an invite.
Was this helpful?