
Creating Access Groups
How to set up an access group so the right people can open the right doors.
An access group is the bridge between an identity group (the who) and a lock group (the what they unlock). Everyone in the identity groups you add is granted access to every lock in the lock groups you add. Members keep that access permanently until the group is removed.
Each access group belongs to a single location, and the identity groups and lock groups you add must share that same location.
Step 1 — Open the Access Groups list
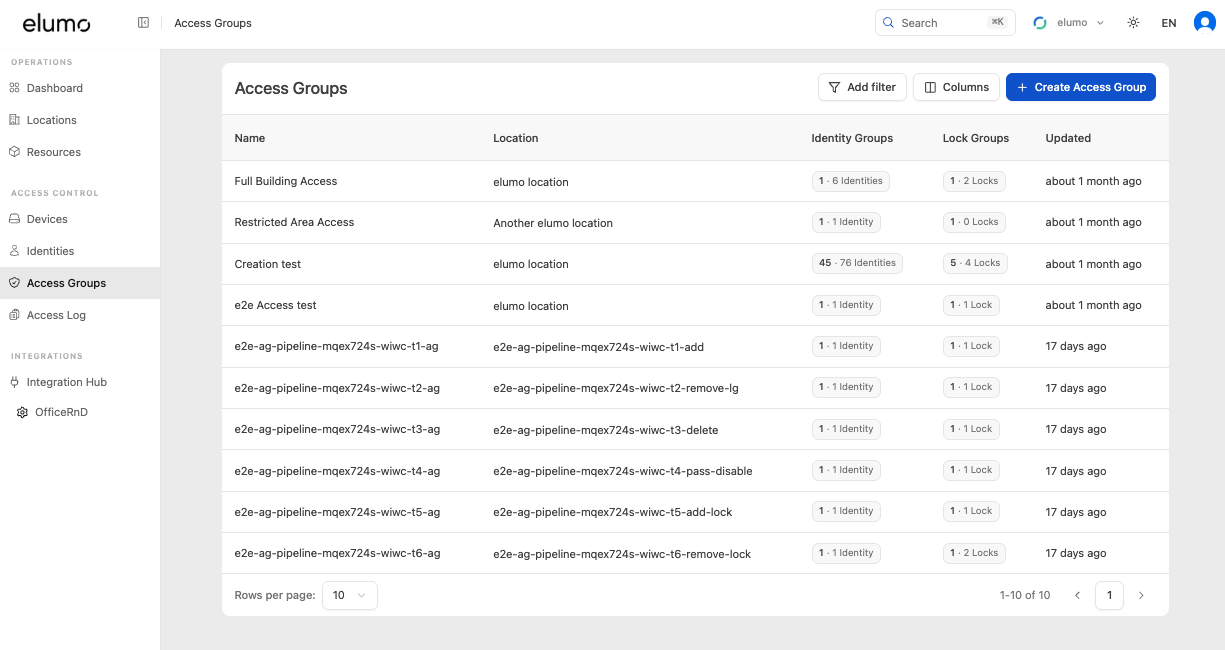
In the left-hand navigation, under Access Control, select Access Groups.
The list shows every access group with its location, the number of identity groups and lock groups it links, and when it was last updated. Use Add filter to narrow the list, or Columns to choose which columns are shown.
Step 2 — Start a new access group
Select Create Access Group in the top-right of the list.
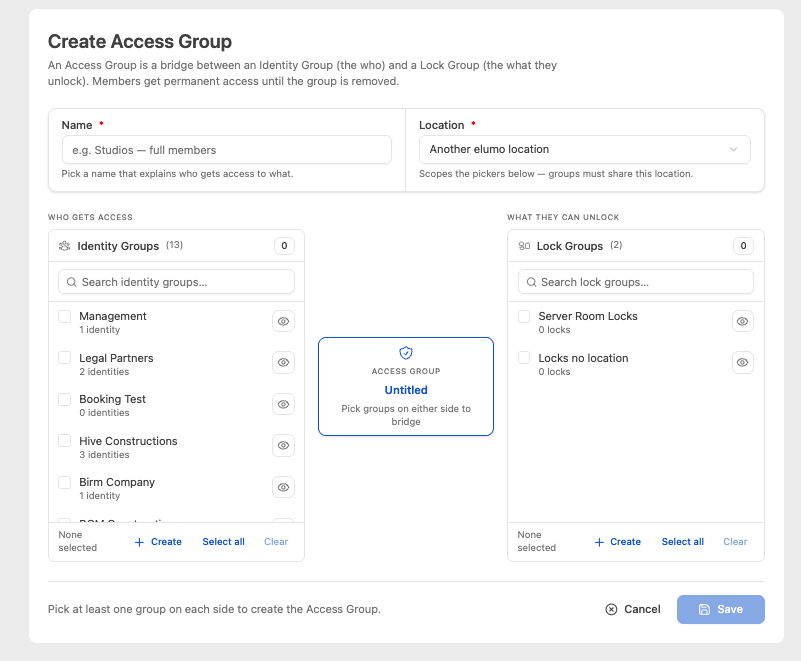
This opens the Create Access Group page — a single screen where you name the group, choose its location, and pick the groups on each side.
Step 3 — Name the group and choose a location
Name (required) — give the group a name that explains who gets access to what, e.g. ‘Level 3 Staff — Day Access’.
Location (required) — select the location this group applies to. This scopes the pickers below: only identity groups and lock groups at the same location will appear.
Tip: If the location you need isn’t listed, you may not have permission for it. Revise your permissions first with your Portfolio Admin and return.
Step 4 — Choose who gets access
In the Who gets access panel on the left, tick the identity groups whose members should be granted access.
Use the search box to find a group quickly.
Select the eye / Show icon next to a group to preview/edit the identities inside it.
Select all or Clear act on the whole list,
Create lets you build a new identity group without leaving the page.
As you select groups, the counter at the top of the panel and the central bridge card update to show how many identities are included.
Step 5 — Choose what they can unlock
In the What they can unlock panel on the right, tick the lock groups these people should be able to open. The same search, Show preview, Select all / Clear and Create controls are available.
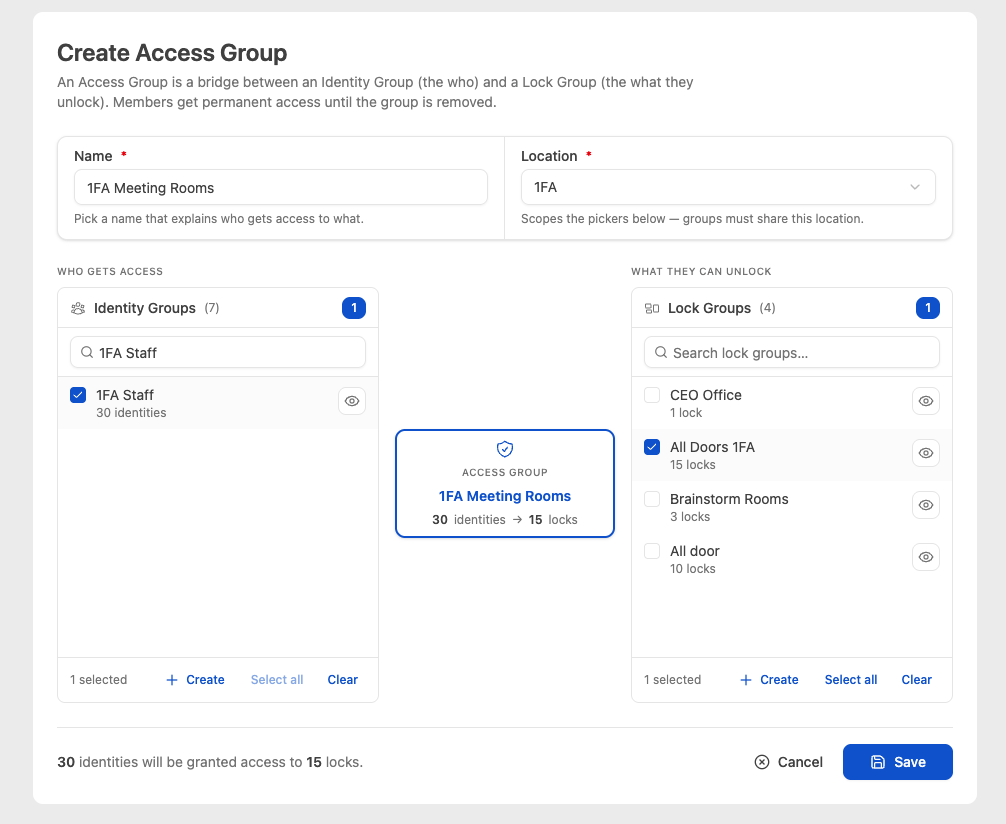
The central card now shows the full bridge — for example ‘Level 3 Staff — Day Access, 43 identities to 5 locks’ — so you can sanity-check the link before saving.
Step 6 — Review and save
A summary bar at the bottom of the page confirms the outcome in plain language, for example ‘43 identities will be granted access to 5 locks.’
Check it reads as you intend, then select Save. (Select Cancel to discard without creating anything.)
Once saved, the new access group appears in the Access Groups list, and access takes effect for everyone in the selected identity groups.
Managing an access group later
Change who or what is included — open the access group, add or remove identity groups and lock groups, then save.
Rename — update the group’s name; this does not affect its members or locks.
Delete — removing the access group removes the access it granted. The underlying identity groups and lock groups are not deleted, only their link through this access group.
How it all fits together
Identity group — a collection of people (identities) at a location.
Lock group — a collection of locks/doors at a location.
Access group — the bridge that grants every person in its identity groups access to every lock in its lock groups, all within one location.
Because the same identity group or lock group can be reused across multiple access groups, you can adjust access simply by adding or removing groups, without touching the individual people or locks.
Quick answers
Why can’t I see the identity group or lock group I want to add?
The pickers only show groups at the same location as the access group. Change the location, or create the group at that location first.
Can one access group cover more than one location?
No. Each access group belongs to a single location. Create a separate access group for each location.
When does access take effect?
As soon as the access group is saved with at least one identity group and one lock group.
Was this helpful?