
Locations Management
What a location is in elumo, and how to configure its timezone, opening times and Tap to Book settings.
A location is a customer site or building in elumo. Everything else in the platform — devices, resources, identities, lock groups and access groups — belongs to a location.
Locations aren’t created by hand in the portal. They’re added by the elumo team during onboarding. This article covers how to find and configure them.
Finding your locations
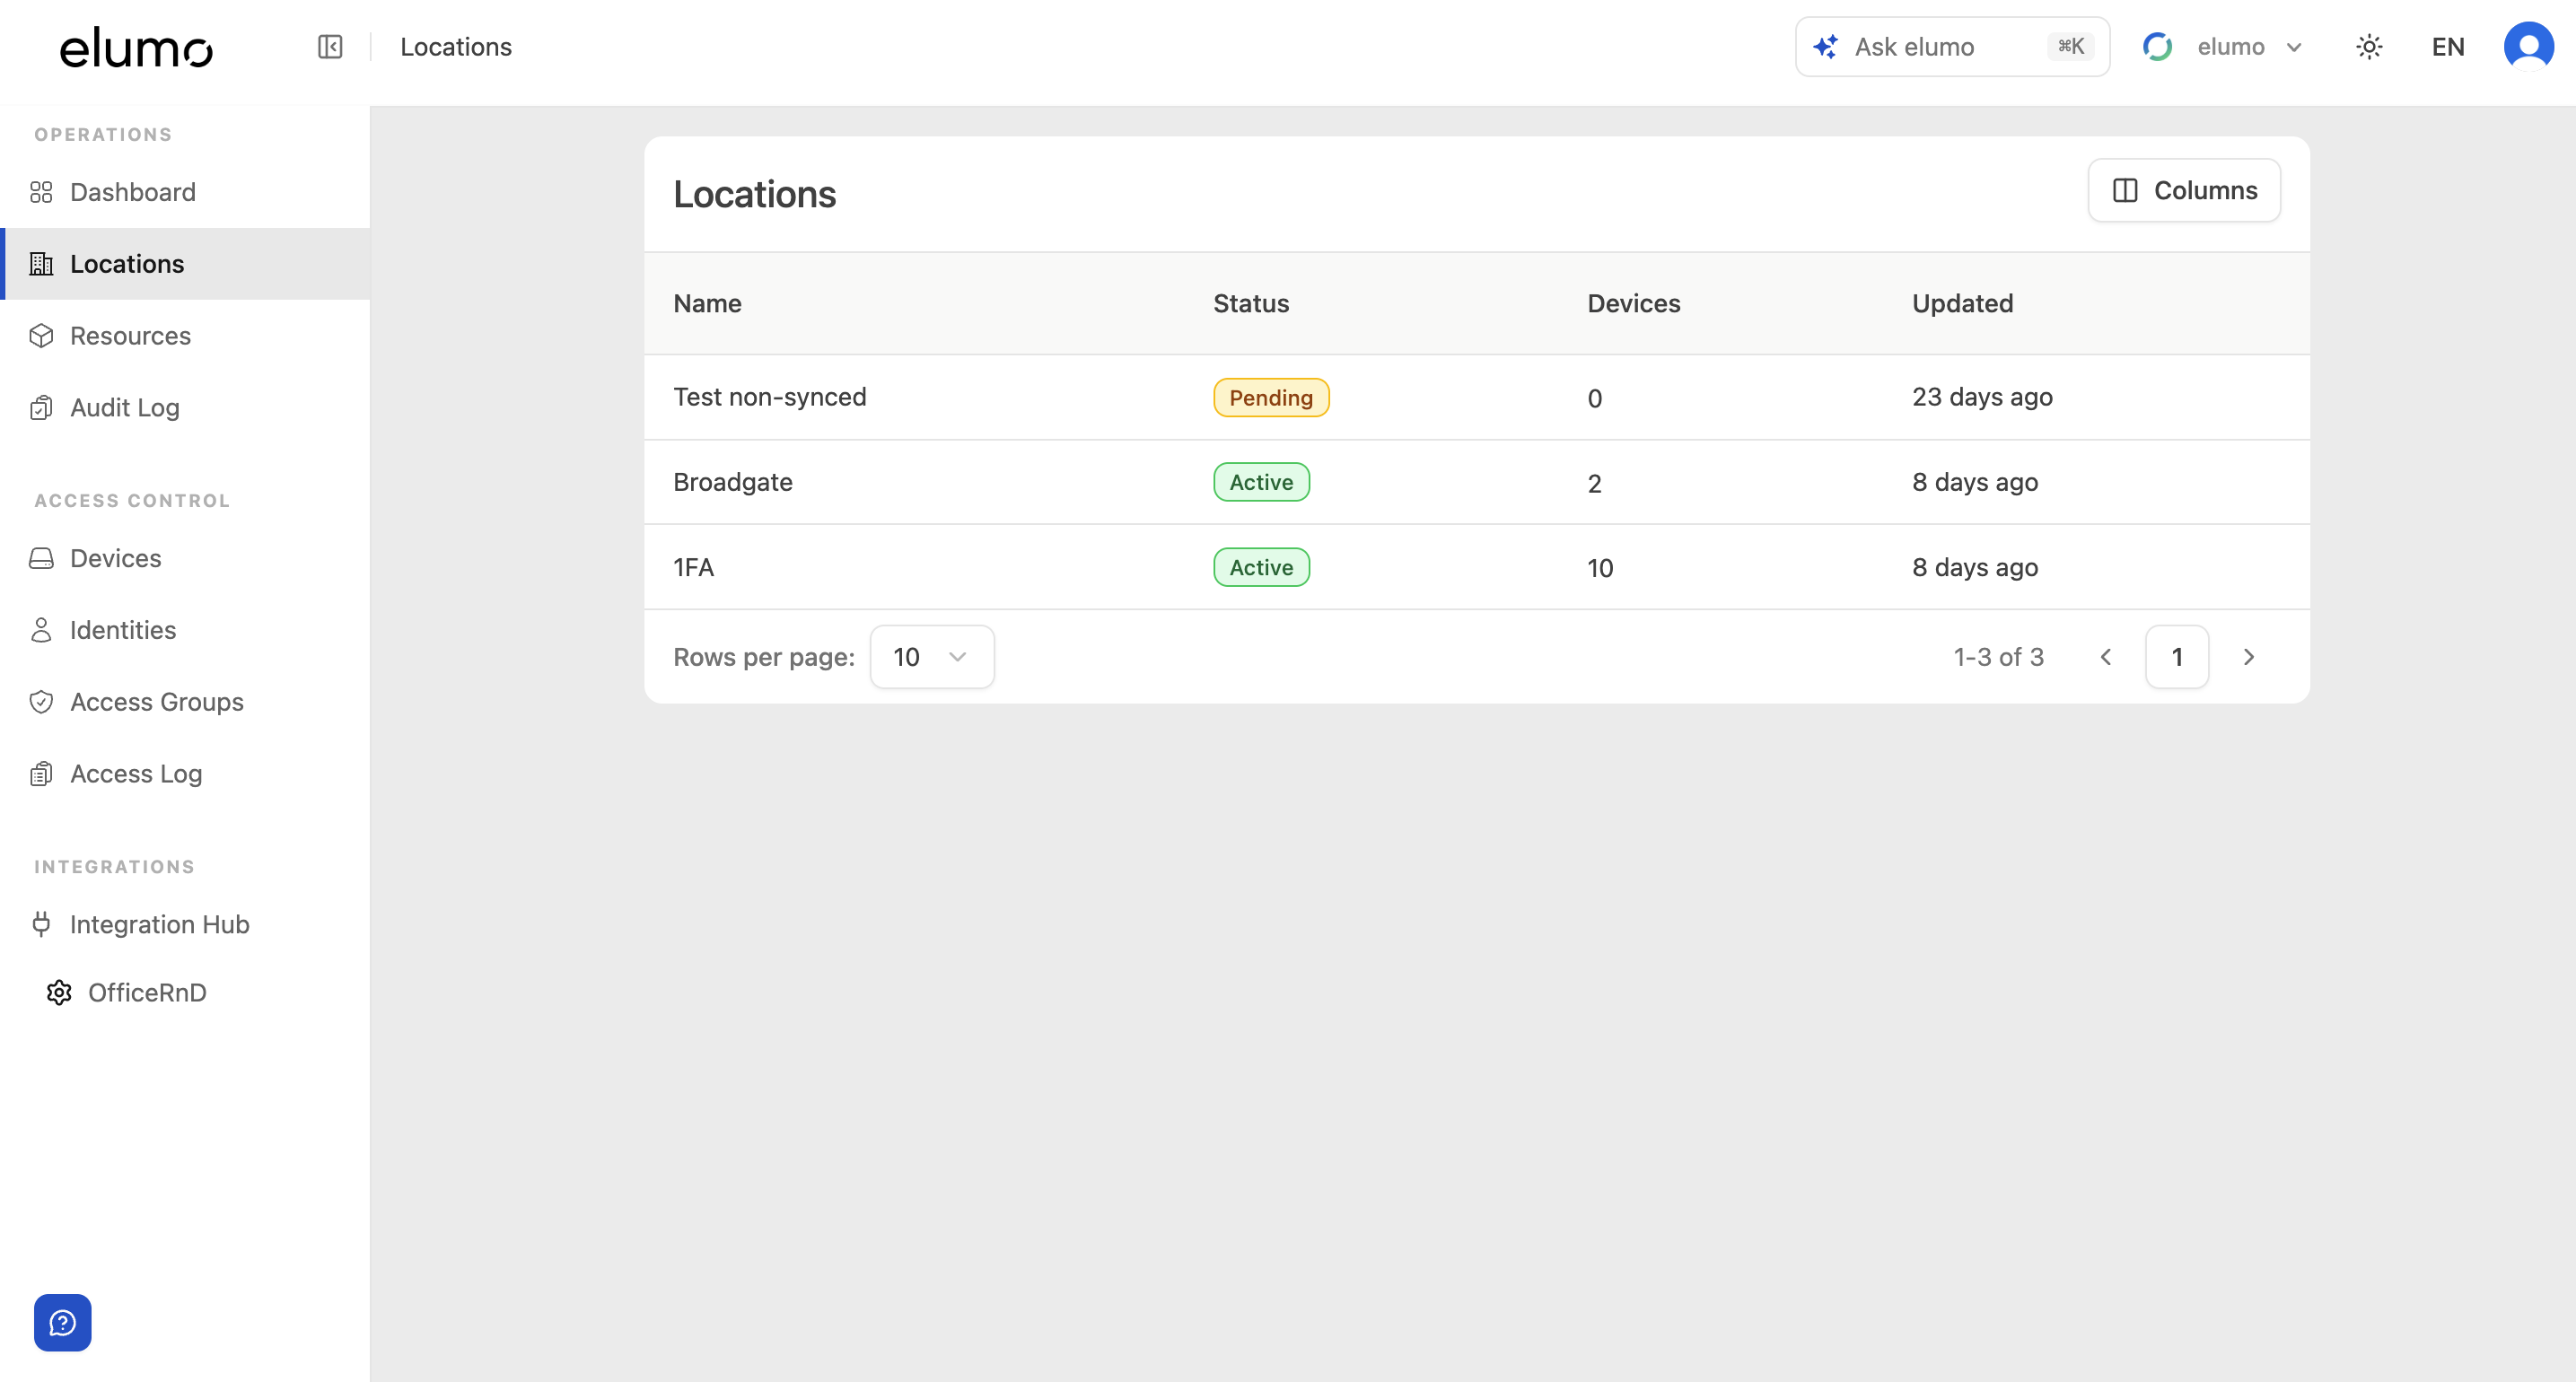
In the left-hand navigation, under Operations, select Locations. The list shows each location with its status (such as Active or Pending), the number of devices installed, and when it was last updated. Select a location to open it.
Opening a location
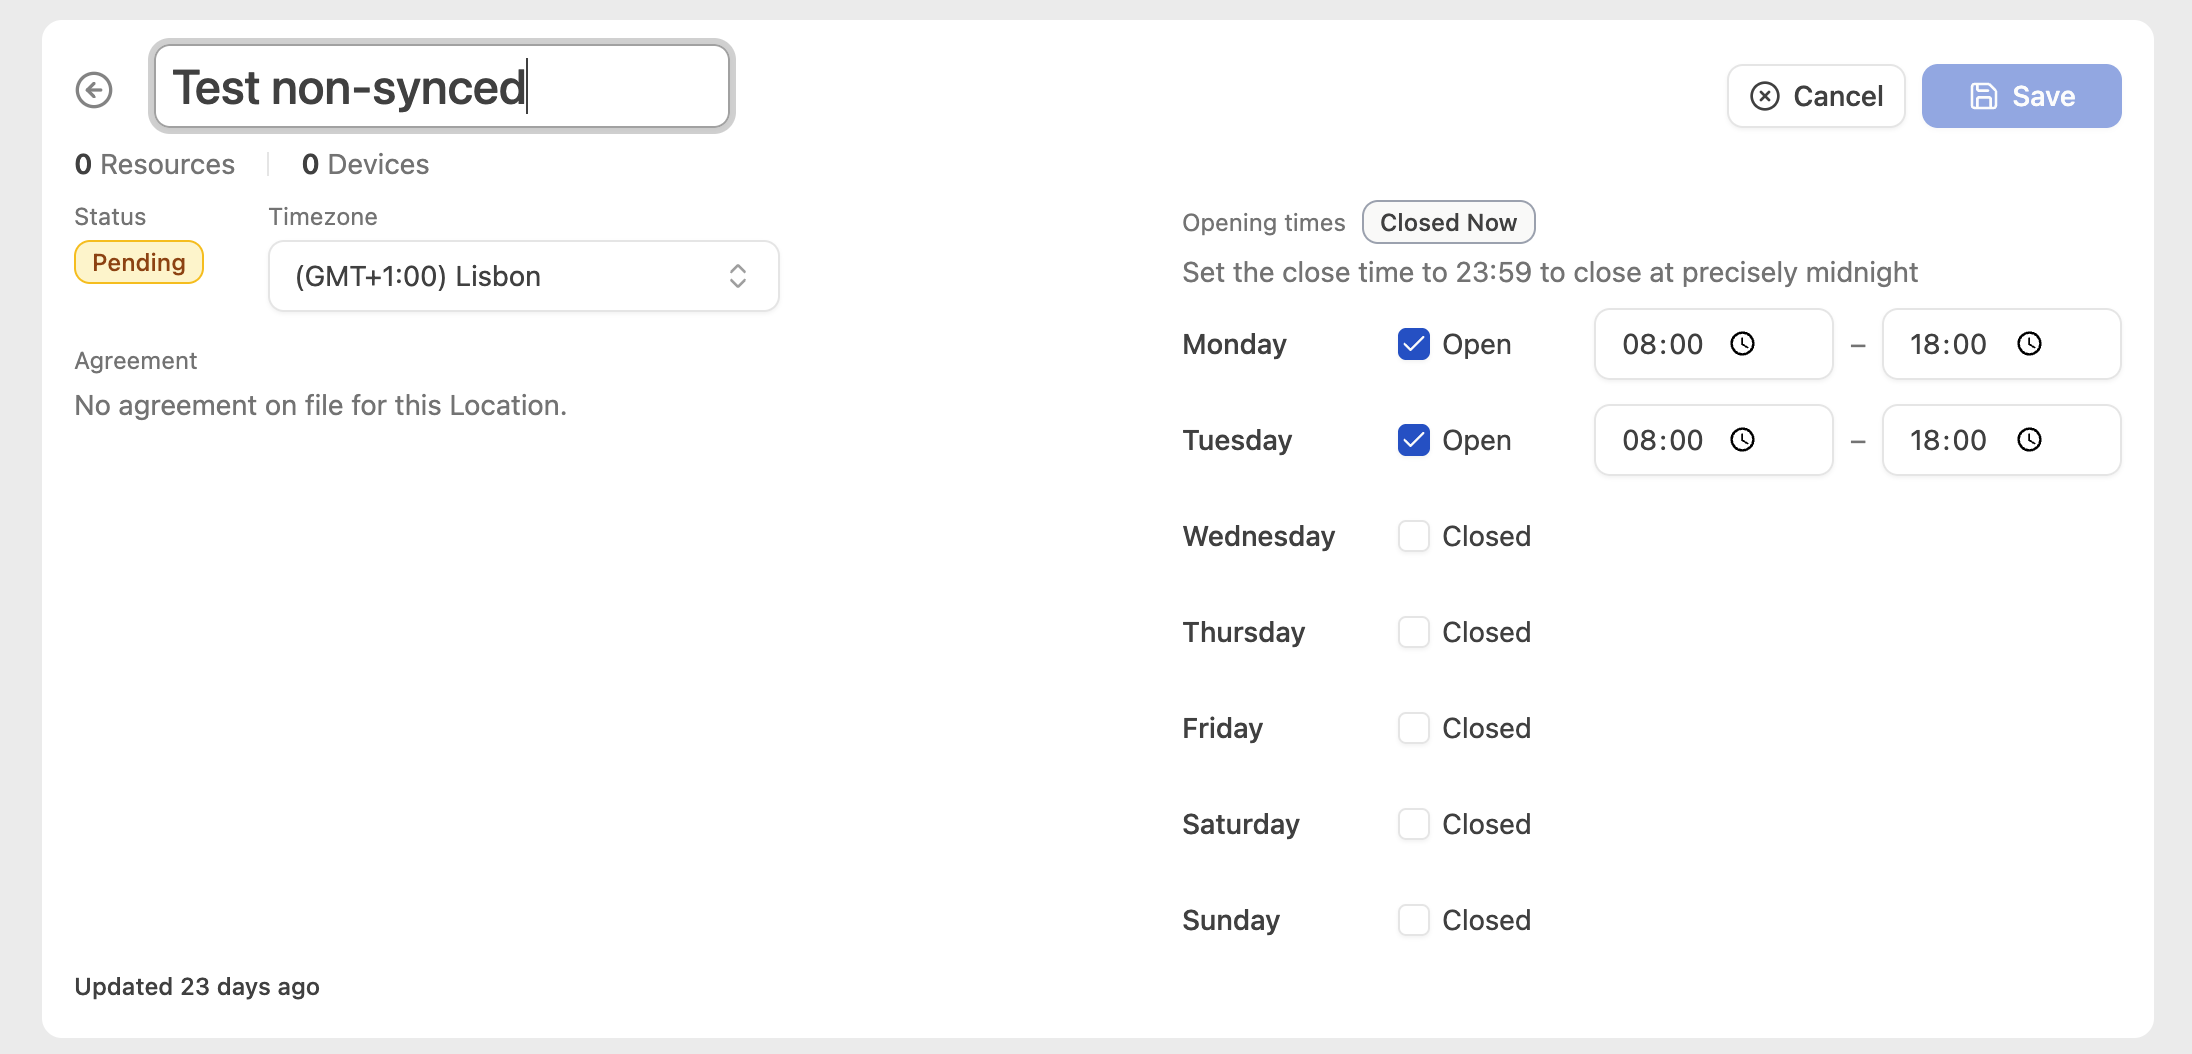
A location’s page shows its status, timezone, opening times and any agreement at the top, along with a live Open now / Closed now badge. The Overview & Settings tab holds its booking settings and installed devices; the History tab shows past changes.
Name, timezone & opening times
How these are managed depends on how the location was set up.
Integration-synced locations
Locations synced from an integration show a View in integration link. Their name, timezone and opening times are managed in the integration and can’t be edited in elumo.
Non-synced locations
These show an Edit button. Select it to change the Name, the Timezone (used for all scheduling here), and the weekly Opening times — set open and close times per day, tick a day Closed, and set a close time of 23:59 to close at precisely midnight. Select Save when done.
Status and the agreement
A location’s status is driven by the agreement attached to it. The Agreement field on the location’s page shows that agreement — click it to open the agreement (it reads ‘No agreement on file’ when there isn’t one). The status can be:
Pending — the location exists but doesn’t yet have an active, countersigned agreement (for example it has just been created, or the agreement is drafted but not yet countersigned).
Active — the location has an active, countersigned agreement and today falls within the contract term.
Inactive — the agreement has expired or become invalid (for example it was terminated), so the location is no longer covered.
Deleted — the location has been removed, either manually by an admin or by a lifecycle rule.
Booking & access settings
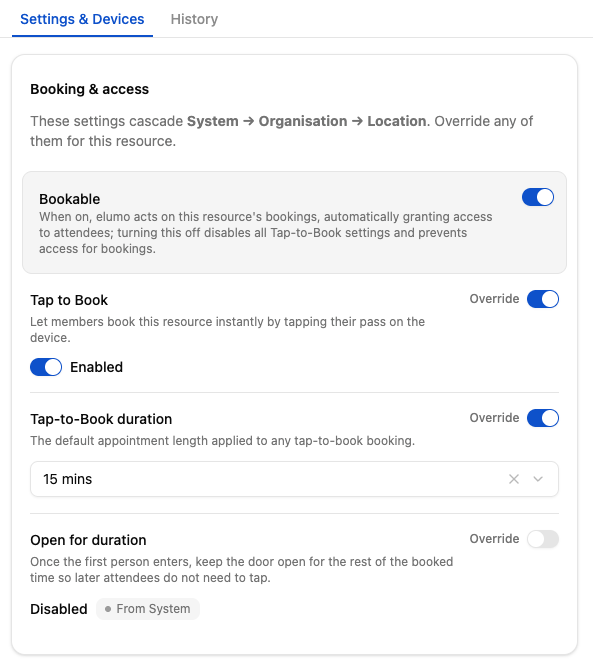
On the Overview & Settings tab, the Booking & access panel controls how access relating to bookings behave. These settings cascade from System (elumo’s default) → Organisation down to the location, so each shows its inherited value (for example ‘Enabled · From System’) until you turn on Override and set your own:
Tap-to-Book — let members book this location’s resources by tapping their pass on a reader.
Tap-to-Book duration — the default length of a tap-to-book booking, for example 15 mins.
Open for duration — once the first person enters, keep the door open for the rest of the booked time so later attendees don’t need to tap.
Whatever you set here applies to every resource at the location, unless a resource overrides it.
Devices at a location
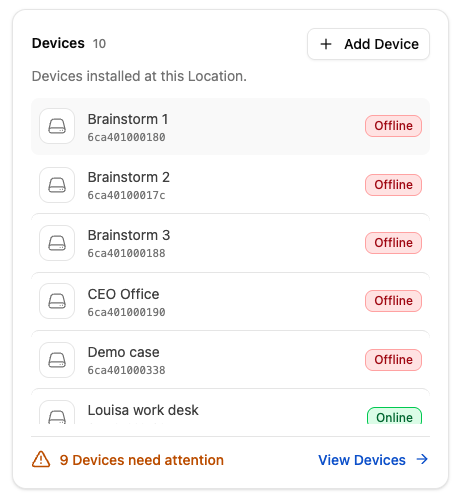
The location page lists the devices installed there, each with a live Online or Offline status and an alert if any need attention. Use Add Device to assign an existing device to this location. Moving a device to another location removes it from all resources and lock groups at its current location, so elumo asks you to confirm first.
Good to know
Timezone drives all scheduling, so check it whenever a location is first set up.
Location settings cascade to every resource unless the resource overrides them.
A location’s status (such as Active or Pending) shows on both the list and its page.
Was this helpful?