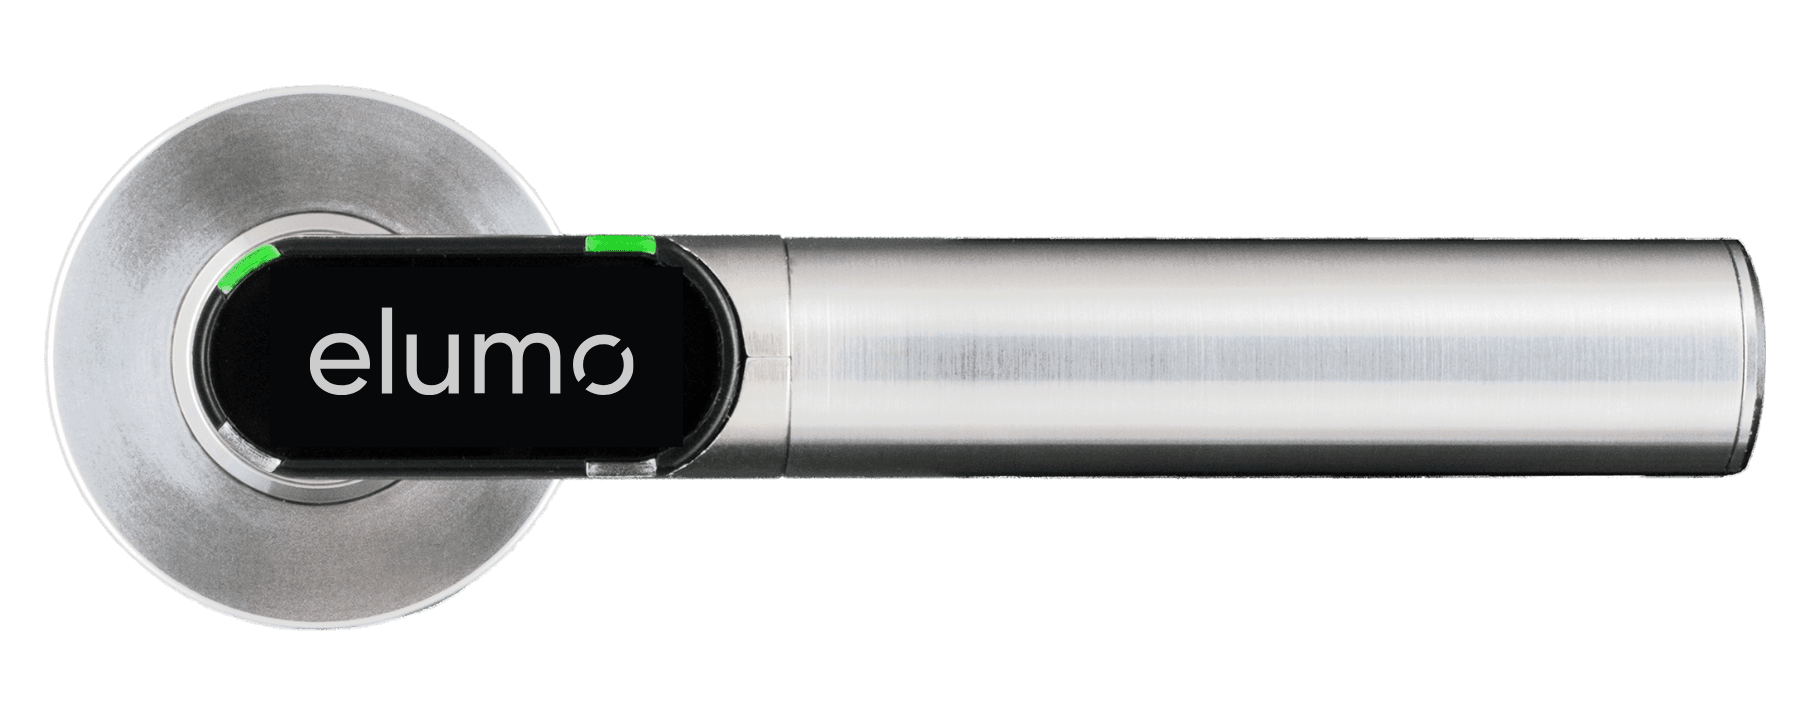
Docs / elumo Hardware
elumo Wireless Lock installation (circular)
Installation steps for the circular version of the elumo Wireless Lock handle
Introduction
This installation guide explains how to install the elumo Wireless Lock handle with a circular rosette fitting. The circular rosette is the most common fitting on wooden doors and is sometimes combined with a separate key rosette.
Before you start
⚠️ CAUTION – The cover of the electronic door handle can be damaged if the mounting screws are too long. Tighten the mounting screws with a torque of 2 Nm.
General assembly instructions
Check the approval when installing the elumo Wireless Lock handle in a fire / smoke resistant door or in an escape door.
If a cylinder holder is present in the door, seal it properly – for example, using a dummy cylinder.
Carry out the installation with the door open.
Ensure that the latches or seals fitted to the door do not hinder the proper operation of the elumo Wireless Lock handle.
Ensure that the door handle does not protrude and prevent the door from swinging freely.
When installing the elumo Wireless Lock handle in the circular and oval rosette versions, the hole in the door for inserting the handle pin should have a diameter of at least 25 mm.
Before assembling the door handle, always check whether all the components can move freely.
After assembly, check the function with the door open.
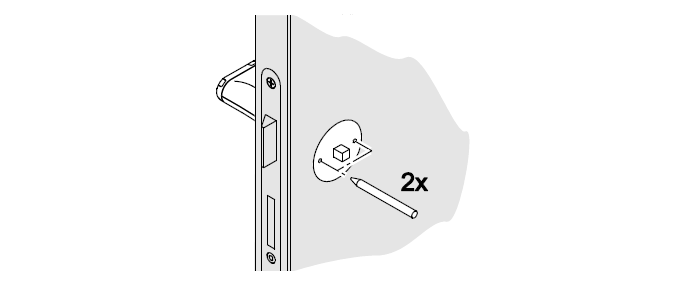
Drilling template
The drilling template supplied is used to mark the drilling holes.
There should be a distance of at least 38 mm between the two drilling holes for the handle rosette and that for the key rosette.
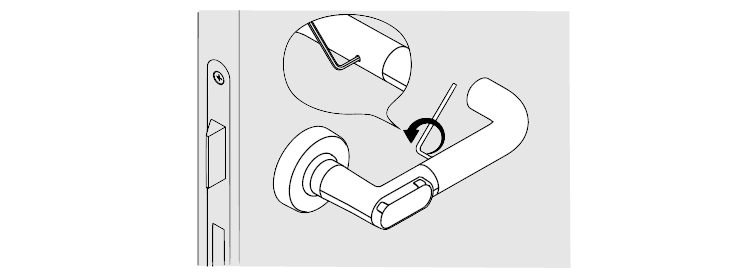
1. Assemble the square pin
The square pin has to be assembled before installation on the electronic door handle (outside). This applies to all versions; the procedure is shown here using the circular rosette version as an example.
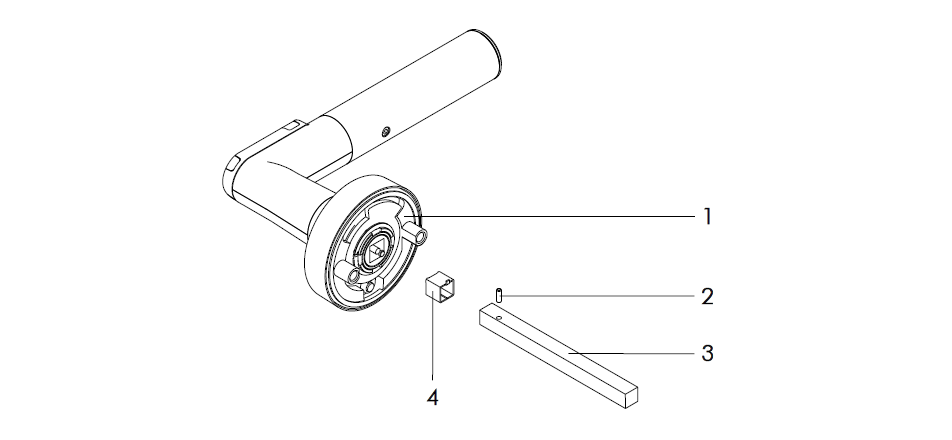
Components
Electronic door handle
Spiral clamping pin
Square
Adapter sleeve for square (only for 7 mm square)
Steps
Insert the adapter sleeve into the square holder (if required).
Insert the square onto the retaining pin and into the square holder.
Insert the spiral clamping pin into the square.
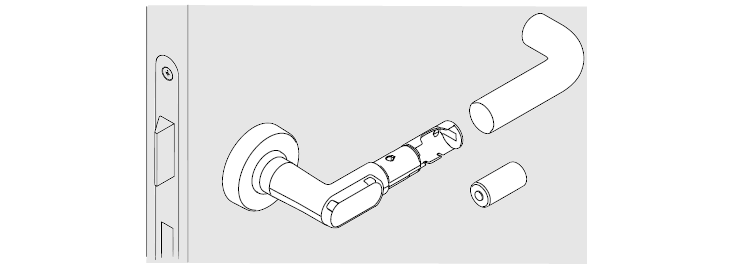
2. Install the Circular rosette fitting
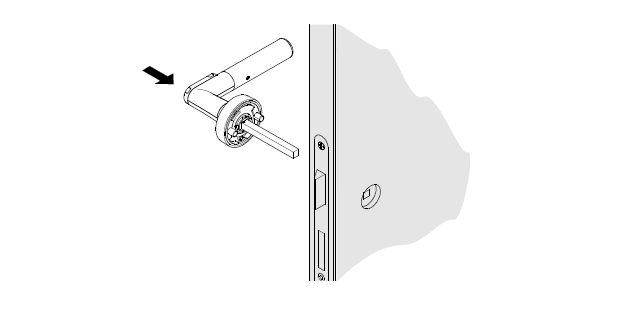
Insert the square pin of the electronic door handle into the square nut of the lock.
Place the drilling template on the square pin, align horizontally and centre-punch the hole markings.
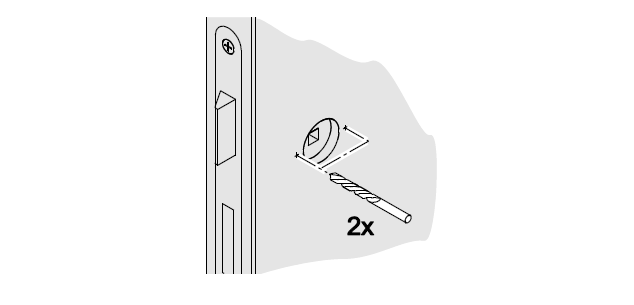
Remove the square pin again.
Drill holes of diameter 8 – 8.5 mm at the marked positions. Do not drill into or through the lock casing.
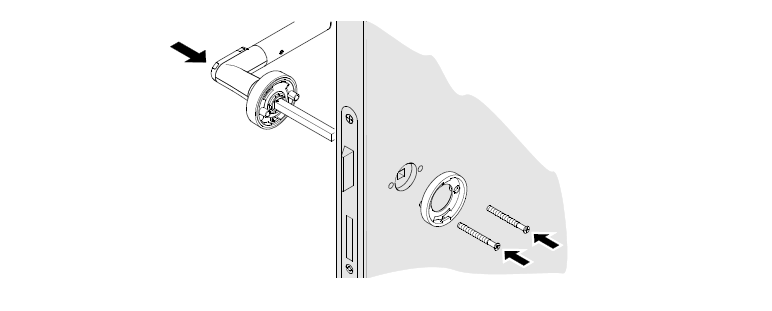
Insert the square pin of the electronic door handle once again into the square nut of the lock. If necessary, place the adapter sleeve supplied on the square pin.
Insert the holder of the mechanical door handle from the other side and screw it along with the electronic door handle through the door panel. Use the supplied mounting screws.
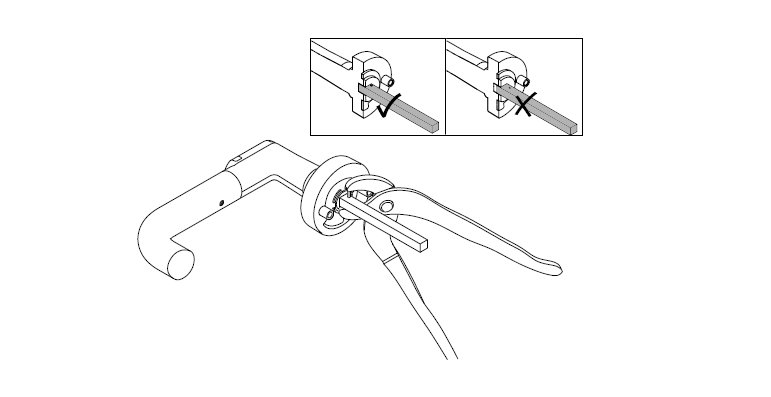
Insert the mechanical door handle keeping it in a horizontal position. For door handles pointing to the right, tighten the rosette towards the left, guide it over the handle holder and engage the bayonet lock. Accordingly, tighten the rosette towards the right for door handles pointing to the left.
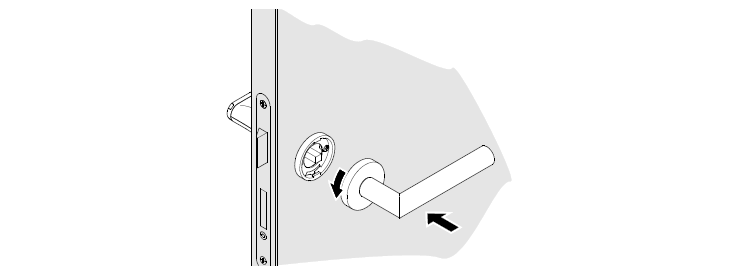
Insert the locking screw from the bottom of the handle and tighten it.

Check the functionality and easy movement of the door handle with the door open. The handle is already engaged when delivered. When engaged, the catch of the lock should be completely inside the lock casing when the latch is pressed down.
To operate the door handle, insert the battery and close the housing (see Replacing the battery below). The electronic door handle disengages only after the battery is inserted. After holding up an authorized key for the first time, only the two upper LEDs light up as an indication. When inserting the battery, make sure that the handle is in its designated horizontal position. This is necessary for the orientation sensor to calibrate and the device to function correctly.
Cleaning
Clean the door handle with a slightly damp cloth. Use only commercially available household cleaners.
Do not use any abrasive or caustic cleaning agents.
Replacing the battery
⚠️ CAUTION – Danger of injury caused by improper use
Do not charge, open or heat the battery.
Always replace discharged batteries with new batteries.
Pay attention to the correct polarity when inserting the batteries.
Change the battery only with the door open. As long as the battery is removed, the door handle cannot engage and thus cannot open the door.
Steps
Using the Allen key provided, countersink the screw on the inside of the door handle.
Remove the gripping sleeve.
Remove the used battery and insert the new battery, paying attention to the polarity. The minus pole of the battery faces towards the gripping sleeve.
If the door handle is used outdoors, also replace the sealing ring of the door handle (see Replace the sealing rings in the maintenance section of the manual).
Insert the gripping sleeve back.
Unscrew the screw on the inside of the door handle until the stop, so that the gripping sleeve cannot be removed.
Was this helpful?