
Managing Devices
How to find, assign, configure and remotely control your elumo devices from the portal.
A device is an elumo hub and reader installed at a door. Devices are provisioned as hardware and added to your account before they are shipped — you don’t create them in the portal. Once they appear, you assign them to a location and resource, configure how they behave, and control them remotely.
Devices are registered through the hardware installation (see the elumo Hardware guides). This article covers managing them in the portal once they’re installed.
Finding your devices
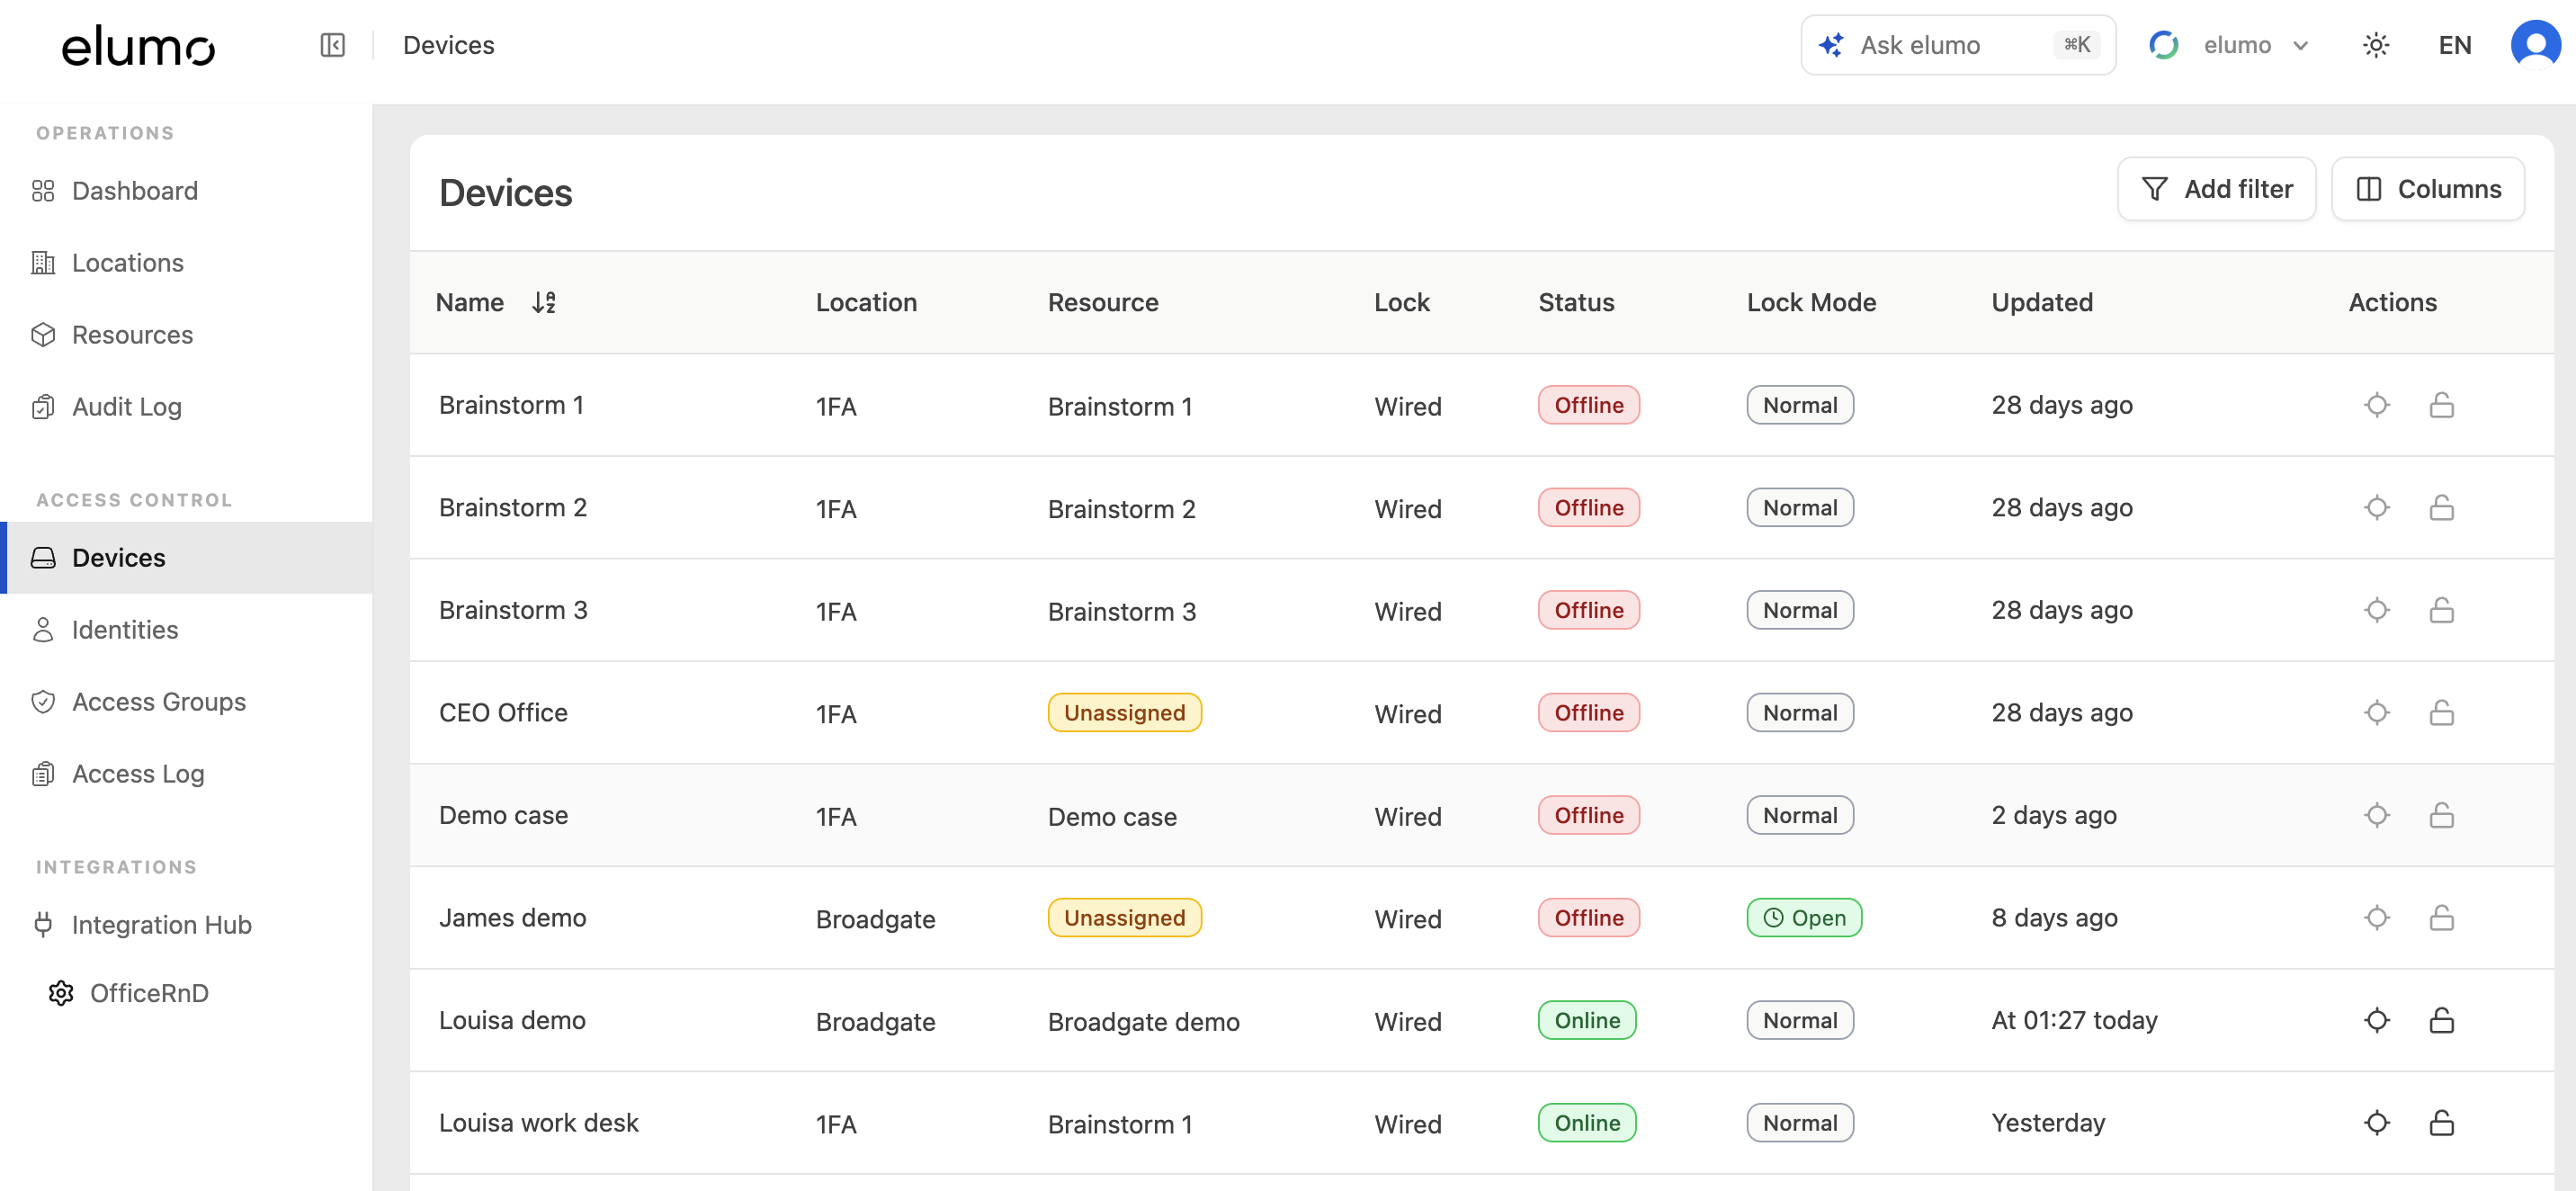
In the left-hand navigation, under Access Control, select Devices. The list shows each device with its location, resource (or an Unassigned badge), lock type, status (Online or Offline), lock mode (Normal, or Open when held unlocked), and when it last updated. Each row has quick Identify and Unlock actions. Use Add filter or Columns to tailor the view.
Opening a device
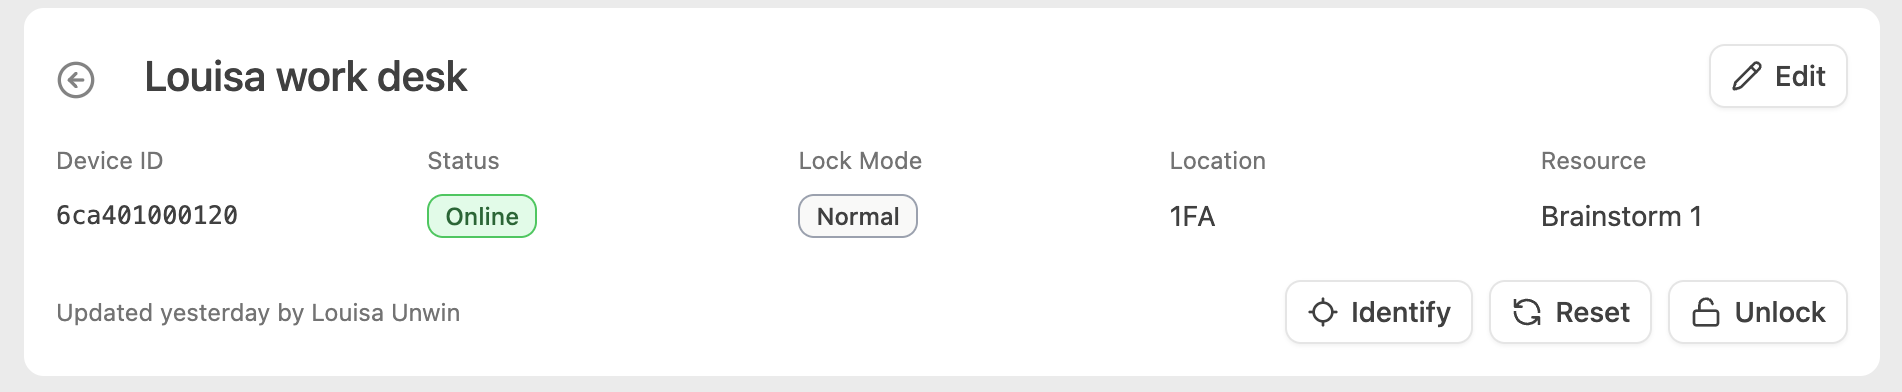
Select a device to open its page. The header shows its Device ID, status, lock mode, location and resource, with Identify, Reset, Unlock and Edit actions. Below are four tabs: Settings & Schedule, Lock Groups, Recent Activity and History.
Assigning a device
Select Edit to give the device a friendly Alias (name) and assign it to a Resource at its location. A device needs a location and a resource before it can automate bookings and access — until then the page prompts you to assign them. (The location comes from where the device is installed.)
Controlling a device
From the device header:
Identify — flashes the device green with an audible alert so you can find it on site. Available when the device is online.
Unlock — remotely unlocks the door once.
Reset — restarts the device.
Device settings
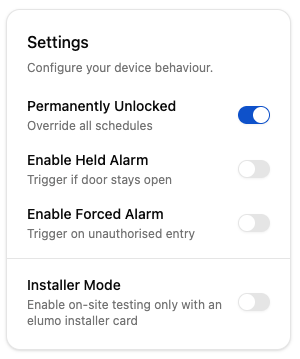
On the Settings & Schedule tab, the Settings panel configures how the device behaves:
Permanently Unlocked — holds the door open and deactivates the reader, overriding all schedules.
Enable Held Alarm — raise an alarm if the door is left open.
Enable Forced Alarm — raise an alarm on unauthorised entry.
Installer Mode — put the device into on-site testing, where it responds only to an elumo installer card and normal access is suspended. Turn it off when installation is done.
Automated unlock schedule
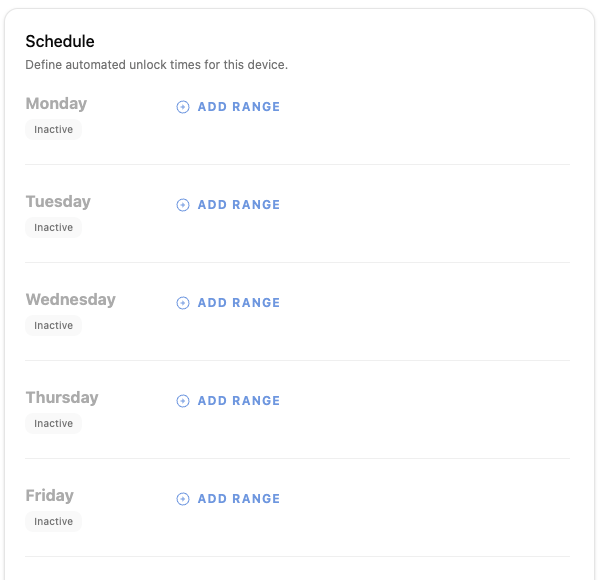
The Schedule panel sets times the door unlocks automatically e.g. if you want to leave the door open at the end of day for staff to come in and service the space. For each day, choose Add range and set the window; days with no range stay Inactive.
Lock, firmware & activity
The Wired Lock / Wireless Lock panel shows the paired lock; for wireless locks it also reports the battery level.
Version Information lists the firmware versions reported by the device (Hub and Reader).
The Lock Groups tab lists the lock groups this device’s lock belongs to; membership is managed from Lock Groups.
Recent Activity and History show recent events at the device and past changes to it.
Good to know
Identify, Unlock and Reset need the device to be online.
A device must be assigned to a location and a resource to drive bookings and access.
Installer Mode suspends normal access — remember to turn it off once installation is complete.
Was this helpful?